

Yes, graphic tees shrink, and how much depends on two things: the fabric and the print method sitting on top of it. Most shrinkage comes from heat and agitation working together, which means a hot wash followed by a high-heat dryer cycle. Prints start to struggle above roughly 176°F (80°C), so the same heat that shrinks your shirt can crack or lift the design.
If you’re trying to size down on purpose, start conservative and check often. If preserving the graphic matters more than the fit, lean toward tailoring or buying pre-shrunk sizes instead of chasing shrinkage in the wash.
- Cotton shrinks the most; polyester and blends resist it.
- Damage risk climbs fast once water and dryer heat pass 80°C.
- One hot wash and dry does most of the work. Extra cycles barely add more.
Key Takeaways
Shrinking a graphic tee safely depends on matching your method’s aggression to your fabric’s tolerance and your print’s heat sensitivity, not on maximizing every wash cycle.
| Point | Details |
|---|---|
| Fabric decides the ceiling | Cotton shrinks most, blends shrink half as much, polyester barely moves. |
| First wash does the work | A single hot wash and dry produces most of the shrink; later cycles add little. |
| Prints fail above 80°C | Plastisol crazes, vinyl lifts, so watch heat closely once you pass that point. |
| Test before you commit | Try a hidden seam or scrap fabric first, then check the dryer every 5 to 10 minutes. |
| Recovery has limits | Conditioner soaks fix relaxation shrinkage but can’t repair cracked or lifted prints. |
Table of Contents
- Why Cotton Tees Shrink More Than You’d Think
- How Different Print Methods Handle Heat
- Safe Ways to Shrink a Graphic Tee on Purpose
- Protecting the Graphic While You Shrink the Shirt
- How Much Shrinkage Should You Actually Expect?
- Can You Undo Shrinkage Once It Happens?
- Where This Advice Comes From
- What the Conventional Shrinking Advice Gets Wrong
- Sources
Why Cotton Tees Shrink More Than You’d Think
Shrinkage in knit fabric is mostly relaxation shrinkage. During manufacturing, yarns get stretched and set under tension. Heat, moisture, and tumbling let those fibers relax back toward their natural, shorter state. That’s the whole mechanism. No mystery chemistry, just fibers letting go of tension they were holding.
Fabric content decides how far that relaxation goes.
- 100% cotton shrinks the most because the fibers absorb water and swell, then contract as they dry.
- Cotton/poly blends shrink less, since the polyester fibers are heat-set at the factory and barely move.
- Pure polyester and most synthetics shrink very little, often under 1 to 2%.
One pattern surprises a lot of people: shrinkage usually hits length before width. That’s why a shrunk tee often feels boxier, with shorter sleeves and a shorter hem, rather than uniformly tighter all over.
How Different Print Methods Handle Heat
Fabric shrinks predictably. Prints don’t always cooperate. Plastisol screen prints, the thick, slightly raised ink used on a lot of graphic tees, can soften, craze, or crack when repeated high heat pushes past about 80°C. You’ll notice a spiderweb texture across the design or a duller, less glossy surface where it used to look smooth.
Heat-transfer vinyl (HTV) is more fragile in a dryer. High heat can loosen its edges or cause the material to lift right off the shirt, sometimes in one piece if you’re unlucky.
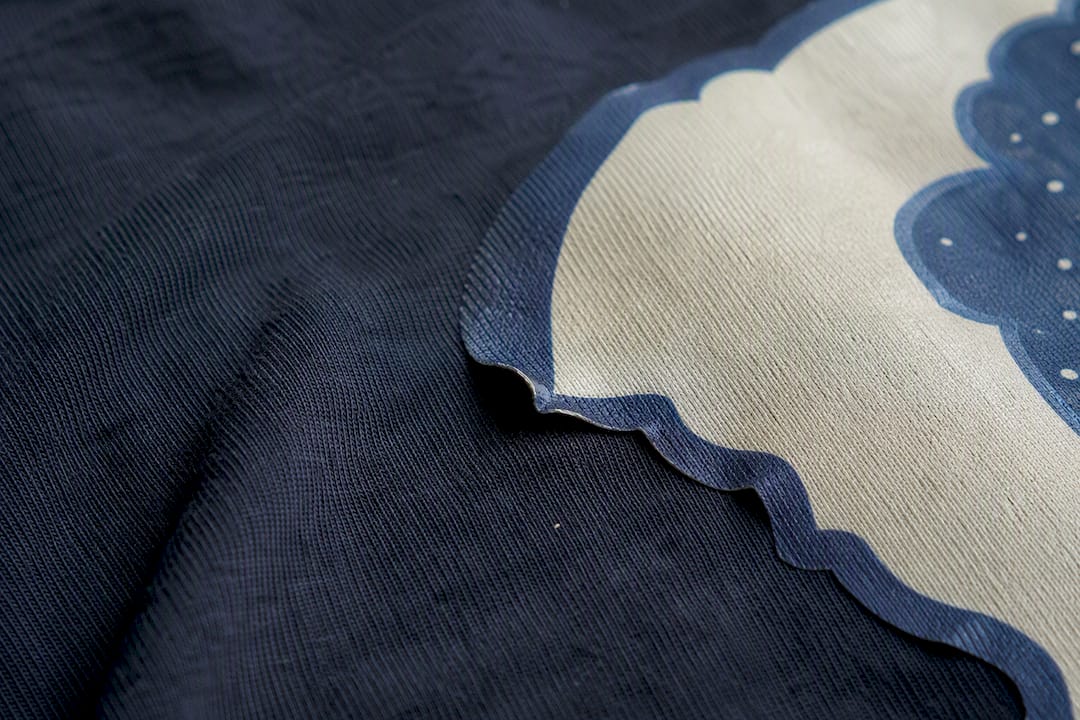
Direct-to-garment (DTG) prints behave a little differently. They’re less likely to crack under moderate heat, but hot water and harsh detergent fade the ink faster than gentle washing would.
Watch for these warning signs that a print is failing:
- Cracking or a spiderweb pattern across the design
- Edges lifting or curling at the corners
- A shift from glossy to matte, or the reverse
- Stiff, plastic-feeling texture where the ink used to flex with the fabric
Pro Tip: If a print already looks slightly cracked or worn, skip the boiling water method entirely. Heat won’t fix a graphic that’s already stressed. It’ll finish the job.
Safe Ways to Shrink a Graphic Tee on Purpose
Start at the gentlest method and only escalate if the shirt doesn’t move enough. This graded approach is the model apparel guides recommend because it limits irreversible mistakes while still giving you real control over the outcome.
Step 0: Read the label first. Fabric content and any care warnings tell you what you’re working with before you touch the washer.
- Method A, conservative: Wash in hot water (not boiling), then run short high-heat dryer bursts of 5 to 10 minutes, checking the fit and the print between each one. This is the safest starting point for most cotton tees.
- Method B, medium: Soak in hot water for 10 to 20 minutes, then move straight to a high-heat dryer cycle. This pulls more shrink than Method A but raises the odds of print stress, especially on plastisol or vinyl.
- Method C, aggressive: A boiling soak or repeated hot wash cycles. Reserve this for undecorated shirts or prints you’re willing to risk, since distortion and dye damage become likely here, including puckered ribbing and uneven sleeves.
- Localized shrinking: Want to shorten just the body length or chest without touching the sleeves? Dampen only that panel and go over it with a steam iron or hairdryer. It’s slower, but it keeps the rest of the shirt untouched.
Pro Tip: Check the shirt every five to ten minutes once it’s in the dryer on high heat. Shrinkage that looks gradual can suddenly accelerate, and there’s no undo button once a print cracks.
Protecting the Graphic While You Shrink the Shirt
A few small habits cut your risk of ruining the design without slowing down the shrink much at all.
- Test on a hidden seam, hem, or a scrap of similar fabric first if you have one available.
- Turn the shirt inside out and wash it alone, away from zippers and heavier garments that cause abrasion.
- Use a mild detergent, skip bleach and fabric softener, and check the dryer frequently so you can pull the shirt the moment the print shows stress.
- When you’re unsure what a print can handle, the manufacturer’s care label is a better guide than guesswork, and tailoring is always the safer bet for a big size change.
For more on keeping a design intact through repeated washes, 3wizardclothing’s graphic tee care guide covers wash temperature and drying habits in more detail. A partner resource on washing printed tees the right way walks through similar precautions if you want a second reference point.
How Much Shrinkage Should You Actually Expect?
Numbers help set expectations here more than vague warnings do. Pre-shrunk, sanforized 100% cotton tees (the kind most retail brands sell) typically shrink only 2 to 5% after one hot wash and dry, roughly half a size to one full size depending on the cut. Untreated cotton without that sanforizing process can shrink 5 to 8% under aggressive treatment, occasionally reaching a full size down.
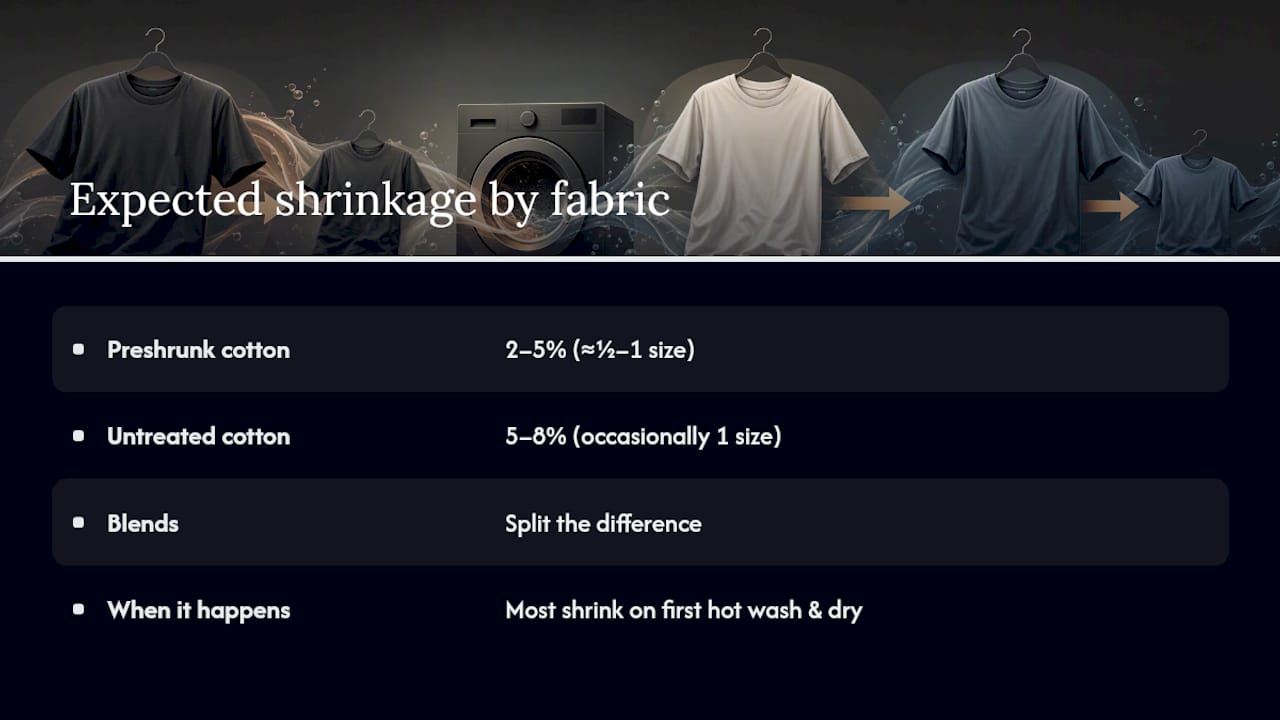
Blends split the difference.
Here’s the part that changes how you should approach laundering: most of that shrinkage happens on the very first hot wash and dry cycle. Running the shirt through more hot cycles after that gives you diminishing returns, not a second wave of shrinking.
Can You Undo Shrinkage Once It Happens?
Overshrunk a favorite tee? You have a few real options before writing it off.
- Conditioner or baby-shampoo soak: Soak the shirt in lukewarm water mixed with a capful of hair conditioner or baby shampoo for about 15 minutes. While it’s still damp, gently stretch the fabric back toward its original shape.
- Wet-blocking: Lay the damp shirt flat, pin it to rough target dimensions, and let it air dry under light tension. This works gradually and is gentler than aggressive stretching.
Pro Tip: Wet-blocking works best on length, not width. Don’t force a shirt two sizes wider than the shrink took it. You’ll stretch the fabric instead of restoring it.
The limitation worth knowing upfront: conditioner soaks and wet-blocking recover relaxation shrinkage, not damage. A cracked plastisol print or lifted vinyl piece stays cracked or lifted. Elastane that’s lost its stretch doesn’t come back either.
Where This Advice Comes From
This guide is written by Josh, a contributor to the 3wizardclothing blog focused on practical apparel care. The recommendations here draw on manufacturer shrinkage data, published care guides, and hands-on familiarity with how decorated cotton tees actually behave in a home washer and dryer.
- For deeper washing and drying steps, see 3wizardclothing’s step-by-step tee care guide.
- For sizing questions before you commit to shrinking anything, check the graphic apparel care guide.
What the Conventional Shrinking Advice Gets Wrong
Most guides treat shrinking a graphic tee like shrinking a plain one, and that’s the mistake. A blank cotton shirt can take a boiling soak without consequence. A shirt with a plastisol print on it cannot, and treating them the same way is how good designs end up cracked in the trash pile.
The conventional wisdom also oversells how much control you have. People expect to dial in an exact size reduction like a recipe. Real fabric doesn’t work that way.
What actually matters is sequencing: test small, shrink conservatively, and stop the moment the print shows stress. That’s slower than the internet’s favorite “just boil it” advice, but it’s the difference between a tee that fits and one you have to throw away. Preserving the graphic isn’t a nice bonus here. It’s the entire point of owning a graphic tee in the first place.
— Josh
Sources
Manufacturer shrinkage data and editorial care guides informed this piece, alongside 3wizardclothing’s own print-preservation resources.
- How to Shrink a Cotton Hoodie: Steps, Temperatures, and Realistic Shrinkage %
- Shrinkage: How We Prevent Our Tees From Shrinking
- How to Shrink a Shirt on Purpose for the Perfect Fit
- How to Wash and Care for Graphic Tees (Without Fading or Shrinking) – Aftergraphs


